

A Bullet Journal is the perfect tool for staying organized and productive on a daily basis. You can personalize it to your own needs and get creative with the decoration. The beginning might be overwhelming, that’s why I am going to show you how to set up a brand new month in your Bujo using some amazing Ohuhu art supplies. You can watch the process of this Setup on Ohuhu’s YouTube channel!
Step 1: Art Supplies
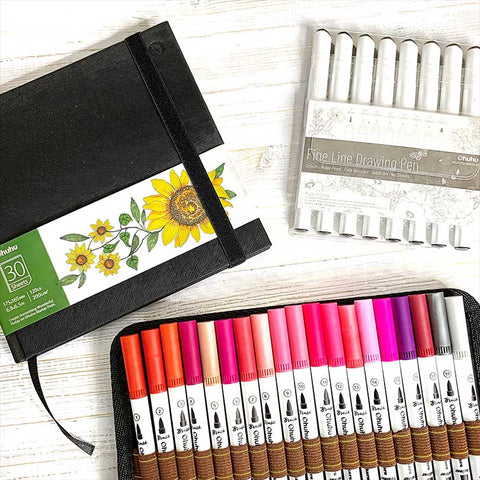
For a monthly Bullet Journal Setup you can use any supplies you like. You need at least a Notebook, of course and pens. For this Setup I used the Ohuhu Mini Marker Pad as a Notebook, their Fineliner Drawing Pens for outlines and the Ohuhu 120 Colors Brush&Fineliner Pens for coloring in. The 120 Colors Brush&Fineliner Pens are perfect for Bullet Journaling as they have a brush and as well as a fineliner tip and they come in a bunch of beautiful colors. For my Setup today I used the colors 95 and 104.
Step 2: Cover Page & Theme

Personally I like giving every month an own theme and color scheme to keep things interesting and to not get bored of my Bullet Journal. You don’t have to do complicated drawings and themes, indeed you don’t have to draw at all. The cover pages basically divide the months from each other and signal that a new month is starting in your journal but just like everything else in bullet journaling, it’s completely optional. For my Setup today I chose the theme “love stories“. The cover page is a super cute and simple lineart of a couple with a heart balloon. The Ohuhu fineliners were perfect for this kind of drawing and the markers added the perfect touch of color. In my case the cover page only takes up one page, however if you want to, you can also spread it out on two pages.
Coming up with a new theme every month might be pressuring, so make sure to take it easy and don’t make the decoration the main focus of your journal. Always remember what you are using it for! Repeating similar themes every now and then or just recreate themes from other Bullet Journal artists is completely fine. When I decide a new theme I either start with the color scheme and find a theme that goes with the colors I want to use or I have a specific doodle in mind which I want to incorporate throughout the month. Making your themes relate to the season or events in the specific month is always a good option, that’s why this theme is dedicated to Valentine’s Day. Let us know if you like it!
Step 3: Monthly Log

One of the most important spreads for a monthly setup is probably the monthly log. This page helps you to plan events, appointments or deadlines in the future. Usually people don’t set up all the weekly pages for a month right away but set them up shortly before the new week starts. That’s why the monthly log is handy. You can write down the event that takes place in the fourth week and later just copy it into the corresponding weekly spread. I will explain weekly spreads a little further later on. As always there are very different options for monthly log layouts. In the picture you can see one example but you can personalize it to your own needs. On the left page I made two lines for each day of the month where you can write down the appointments or tasks for that specific day. On the right side I made a small calendar that is perfect for writing on birthdays and just offers a great overview of the month so you know what date is on which day of the week. I also added some more sections for goals and notes.

These spreads can be as simple as you like or you can also decorate them as much as you want. I kept it relatively simple for my standards but still added subtle touches with the colors and some simple doodles to include the theme. Make sure to check out different layouts for monthly logs to find the one that fits your life the best. You could make a big calendar over two pages for example.
Be open for trying different options and change things up if they are not working out for you.
Step 4: Trackers

The next page includes a habit and weekly tasks tracker. The habit tracker is my favorite kind because it really helps me with staying productive and healthy the most. I made a big box, in pastel pink of course, where you can fill in the days, when you did a specific habit, with a little black dot. The habits are written on the left side of the box, for example working out or drinking enough water. The goal is to fill the box with as many dots as possible and if you notice that one line lacks a lot of dots, you know that you have to focus on that habit more intensely.
The weekly task tracker works very similarly. Depending on how many weeks the month has, mostly four, you have that amount of boxes for every task. Once you have done them in one week, you can color in the boxes. Of course The tasks can be different from person to person just like the habits since everyone has a different life and different needs.
These are all the trackers I have for you today but don’t forget that there are other options or ways to do these.
Step 5: Mental Health Spreads

A Bullet Journal is also a great method to improve your mental health. This can already start while setting up the pages, if drawing relaxes you. Remembering that your Bujo is here to improve your life is vital. Don’t pressure yourself with making it look perfect because that way it won’t have a positive effect on your mental health!
I made two different spreads for you that I really like. Firstly you can see a gratitude log which is perfect for keeping a positive mindset since you will write down one or more things that made you feel grateful every day. It’s amazing to realize everything you can be thankful for whether small or big. Showing gratitude will improve your character and mind a whole lot. Try it out!

The next spread is more fun and looks super cute with the hearts. Valentine’s day is all about love, however giving love to ourselves is also important. This self care bingo is a playful way to remind you of taking care of yourself. Obviously the aim is to fill in all the hearts by doing the little acts of self care written on them. I hope you will spread a lot of love during this month for others as well as yourself.
Step 6: Weekly Spread

Personally I like setting up the first week together with my monthly setup right away. Thus I also included it in today’s blog. When it comes to layouts, weekly spreads might have the biggest amount of options. You can make a spread with pre-set boxes for each day as it is seen in the picture above. If you need a lot of space for planning your days and writing To-Do lists you can just use two pages for one week.
If you don’t want to limit the space of each day but only want to use as much space as you need, you can do a running weekly spread. This way you will start with the header for Monday and write all the tasks and other important things underneath. Once the day is over you can write the header for the next day underneath or next to it. This is useful if your days are very different. Maybe you don’t want to write down anything one day but a huge amount the next day. With this system no space gets wasted.
In general weekly spreads can also just be a big task list and you can make an extra section for events and appointments. The possibilities are endless to be honest. Once you have set up a new weekly, you can transfer everything from your monthly log into it.
We have arrived at the end of this Setup in a cute Valentine’s Day theme. I hope you could find some inspiration for your own Bullet Journal or can understand the monthly setup system a bit better now. I know bullet journaling can seem like a big challenge but it does not have to be one if you keep it simple and adjusted to your own needs. Have fun journaling!


