

Today, I’ll show you how to color skin tones with the Ohuhu Skin Tone Alcohol Art Markers.
In this guide, I’ve included a full video walkthrough and written steps below, showing how to find the right colors for a variety of skin tones, use reference photos, and how to color in a face step-by-step using alcohol markers.
Coloring skin can be one of the most intimidating things to try when you first pick up alcohol markers – but after some practice and a few important tips, you’ll find it’s easy, fun, and rewarding.
Ohuhu’s 24 set of skin tone markers include a great range of colors to create a variety of skin tones. Their upcoming 36 set will offer even more variety.
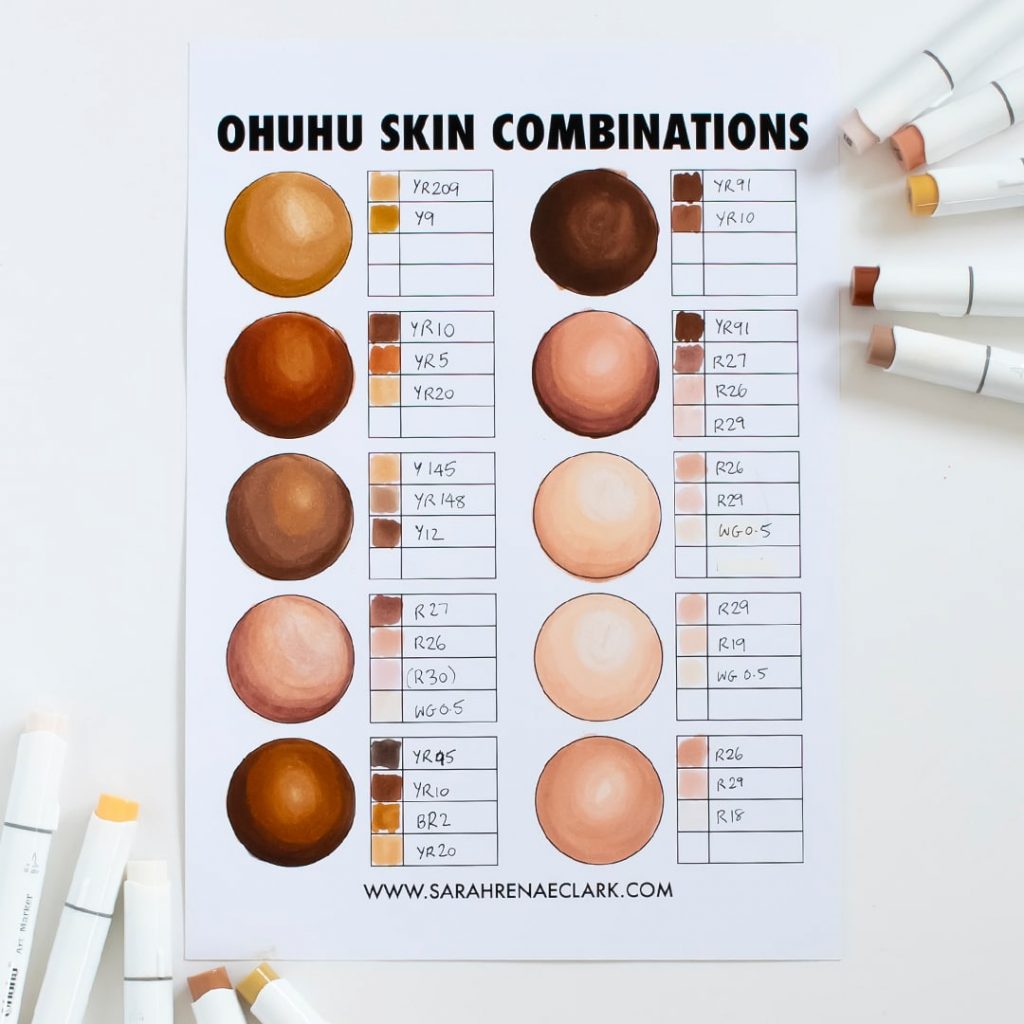
Here’s a look at the colors currently included in the set of 24.

From these 24 skin tone markers, You can create a huge variety of different skin tones by combining different sets of colors for your highlights, midtones and shadows. I’ve included some examples below that you can use to get started, but I encourage you to experiment with your own combinations too. In each of these examples, I’ve tried to use a lighter color for highlights, 1-2 colors for midtones, and 1-2 darker colors for shadows. You can vary these amounts or layer your colors to create even more variety and more skin tones from these same markers – so these examples below are only a few of the many different tones you can create with these 24 markers.
If you’re like me and are looking at buying a bigger set of Ohuhu markers to enjoy a full color range, I was surprised at how many colors were unique to the skin tone set!
The following colors from the 24 skin tone set are NOT included in the 120 set from Ohuhu, which is the biggest set you can currently buy of the alcohol brush markers… making the 24 set a worthwhile extra purchase in my personal opinion!
Even though Ohuhu provide you with a blank swatch for your colors, I like making my own larger swatch on the paper I’ll be using. In this case, I’ve created a swatch on the Ohuhu Spiral-Bound Marker Pad. These pads are bleed-proof and acid-free, so they work well with these markers without bleeding through. Whenever you’re using alcohol-based markers, it’s best to use bleed-proof paper because regular paper will absorb more of the marker, making it harder to blend your colors, using more of your ink, and leaving you with a bigger chance of ink leaking through the page or bleeding out the lines.
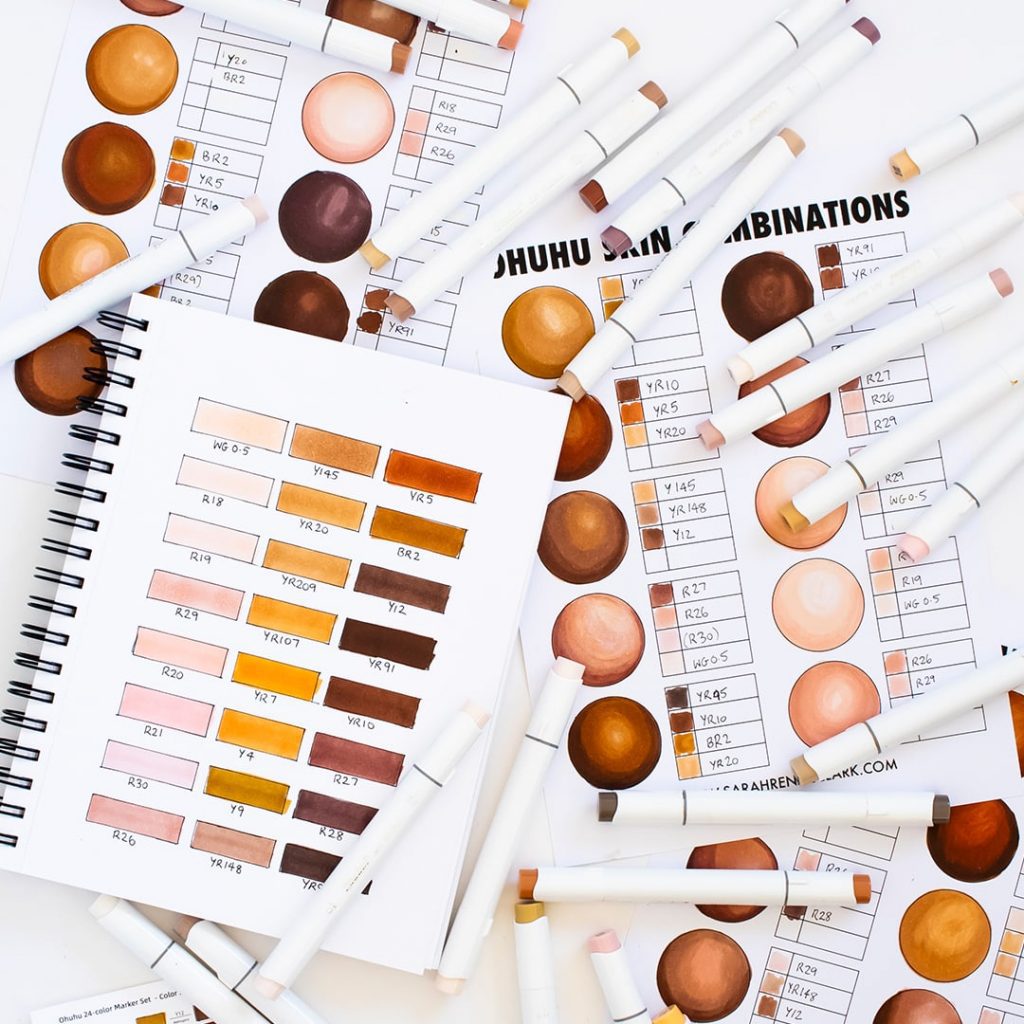
The Ohuhu marker pads come in various sizes and include a plastic bleedproof sheet to stop any bleeding behind the page, although I didn’t have any issues with markers bleeding through anyway. It’s a nice safety net though!
When it comes to the actual coloring pages, I wanted to be able to print my line art first, so I’m using Blending Card I purchased online. Depending on your printer, you may be able to tear out the Ohuhu marker pads with the perforated edges and print on them.
3. Practice!
Instead of starting coloring and *hoping* for the best, it’s always a good idea to choose your colors first and test them out. In each of the examples I provided earlier, I tried to find between 2 to 4 colors. Ideally, I want one color for my shadows, one color for my highlights, and one or two colors for mid-tones.
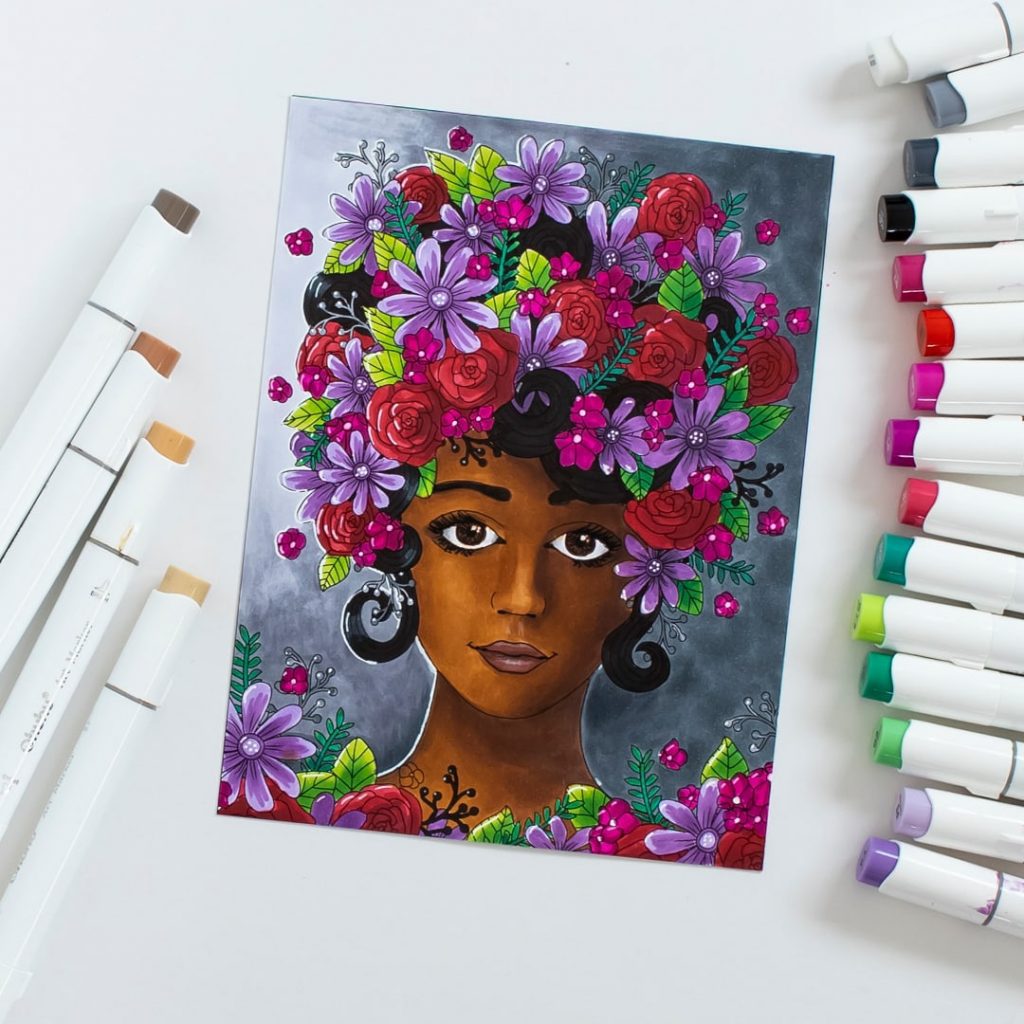
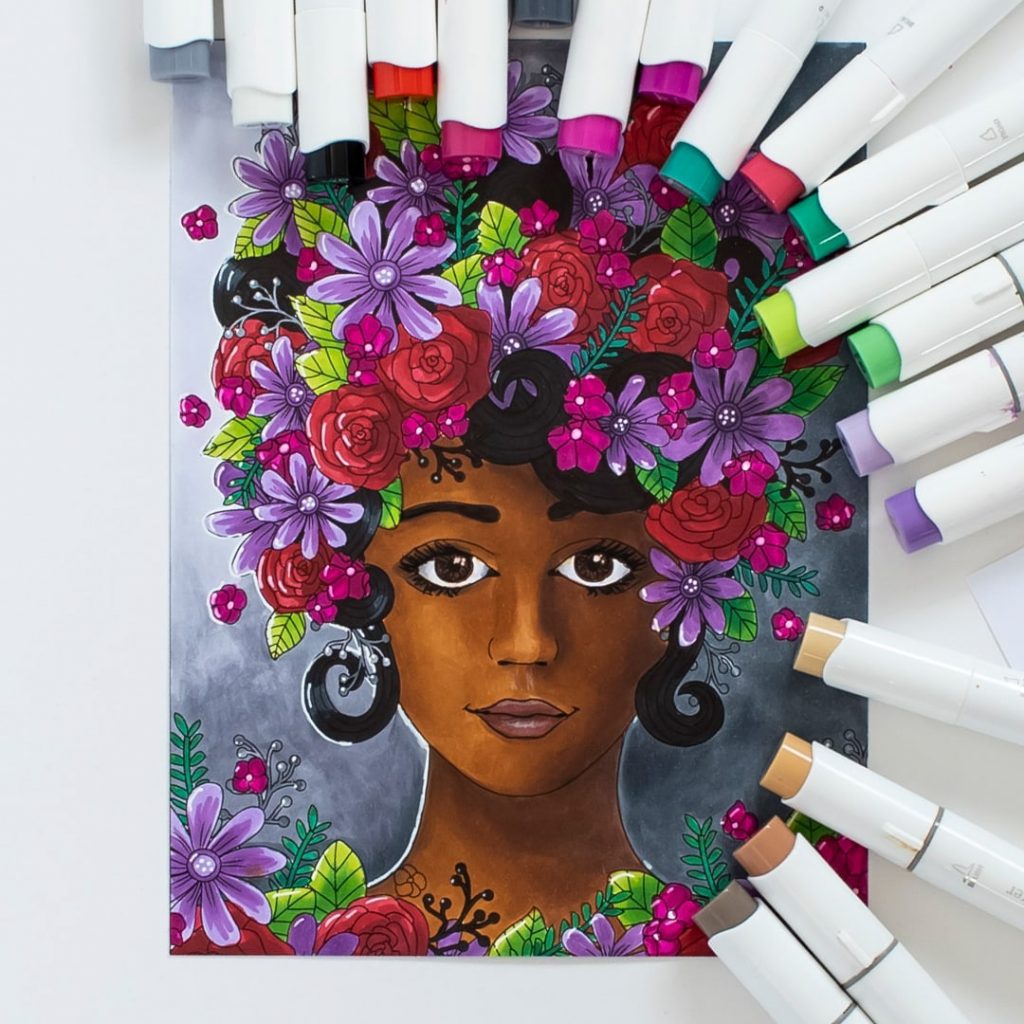
Choosing colors isn’t just something to do when you’re coloring something like skin tones. I do this for every coloring page. With the second picture I colored in the video, I used The Color Catalog to help me choose a set of colors for the flowers in the hair that created the right mood for my page before I began coloring them in. It meant that the final piece looked cohesive and colorful, and I’m really happy with the result.
5. Use a reference photo
If you really want to replicate accurate skin tones, the best way to do this is using a reference photo.
You can find reference photos online on free stock websites like Pixabay, Unsplash or Pexels. Because I was going to be coloring a girl’s face in this example, I just did a search on each of these websites for “girl face” and these are some of the photos I found. From there, I used Photoshop to pull out the colors so you can see how different the skin tones are in each of these examples – but this is not something you need to do. You can just use the reference photo itself as a guide to help you get an idea of the colors, shading and angles.
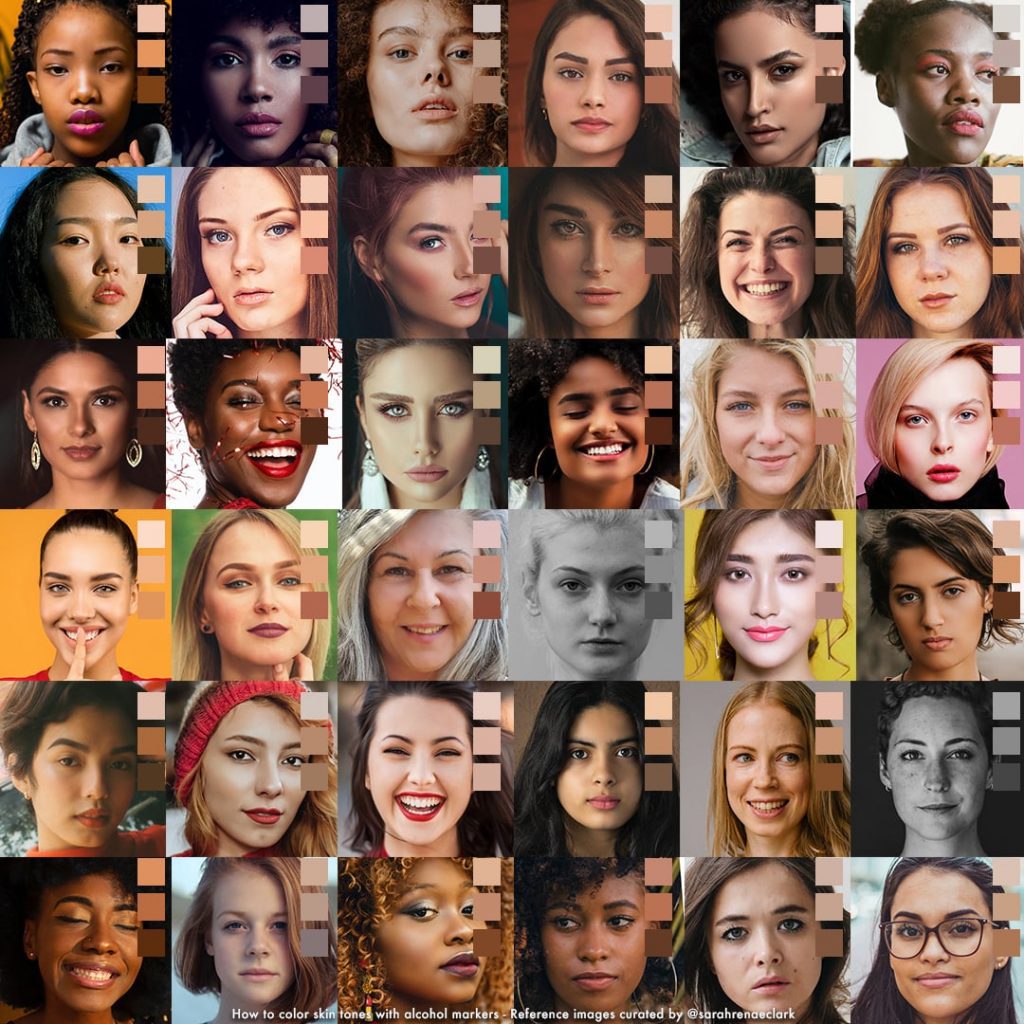
As you can see in this selection of photos, there are a huge range of skin tones, and they don’t always include obvious skin colors. Different lighting plays a huge role in the colors – bigger shadows and moodier scenes create a bigger contrast and difference between the darkest and lightest colors, like these examples.
When choosing a reference photo, there are a few things you should look for.
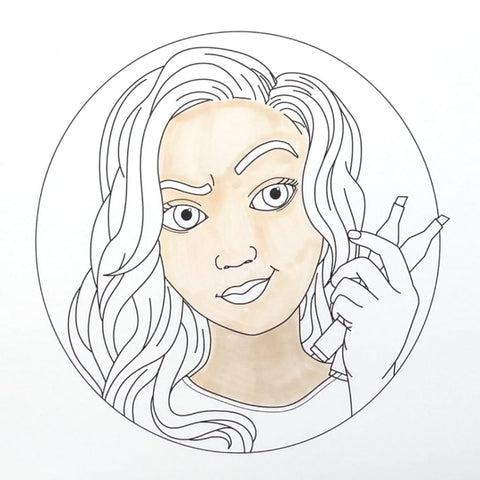
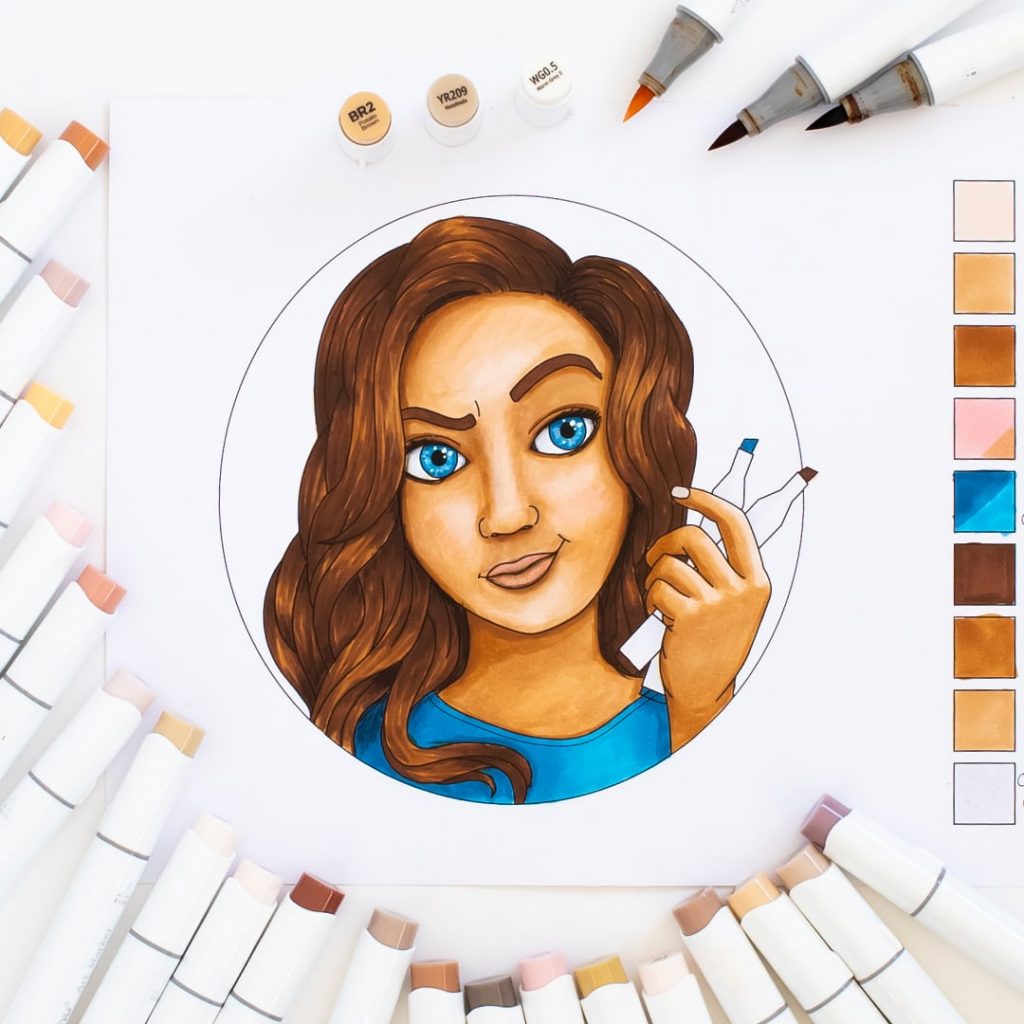
First, I like to fill the entire face with the lightest skin tone (WG0.5). If your image is large, you may prefer to use the chisel tip to help you fill the larger area quickly. Otherwise the brush tip is fun to use and perfect to getting into small spaces and staying in the lines near the edges. I personally prefer the brush tip because I feel it gives me more control over the pressure and movement.
One thing I’ve noticed with the Ohuhu markers is that they do get more saturated with more layers. So when I swatched out my colors, I ended up with VERY saturated and vibrant skin tones. So keep this in mind – you may want to work lightly and keep less layers if you’re wanting pale skin or a dull color. It does, however, mean that we can use a single color for some of our shading too, which we’ll do in our next step.
2. Decide where your shadows will be
- Around the hairline and to frame the face
- Under the neck
- Under the eyebrows
- Under the nose
- Along the side of the nose
- Under the lips
- Under and around the eyes – but not too big or she’ll look really tired
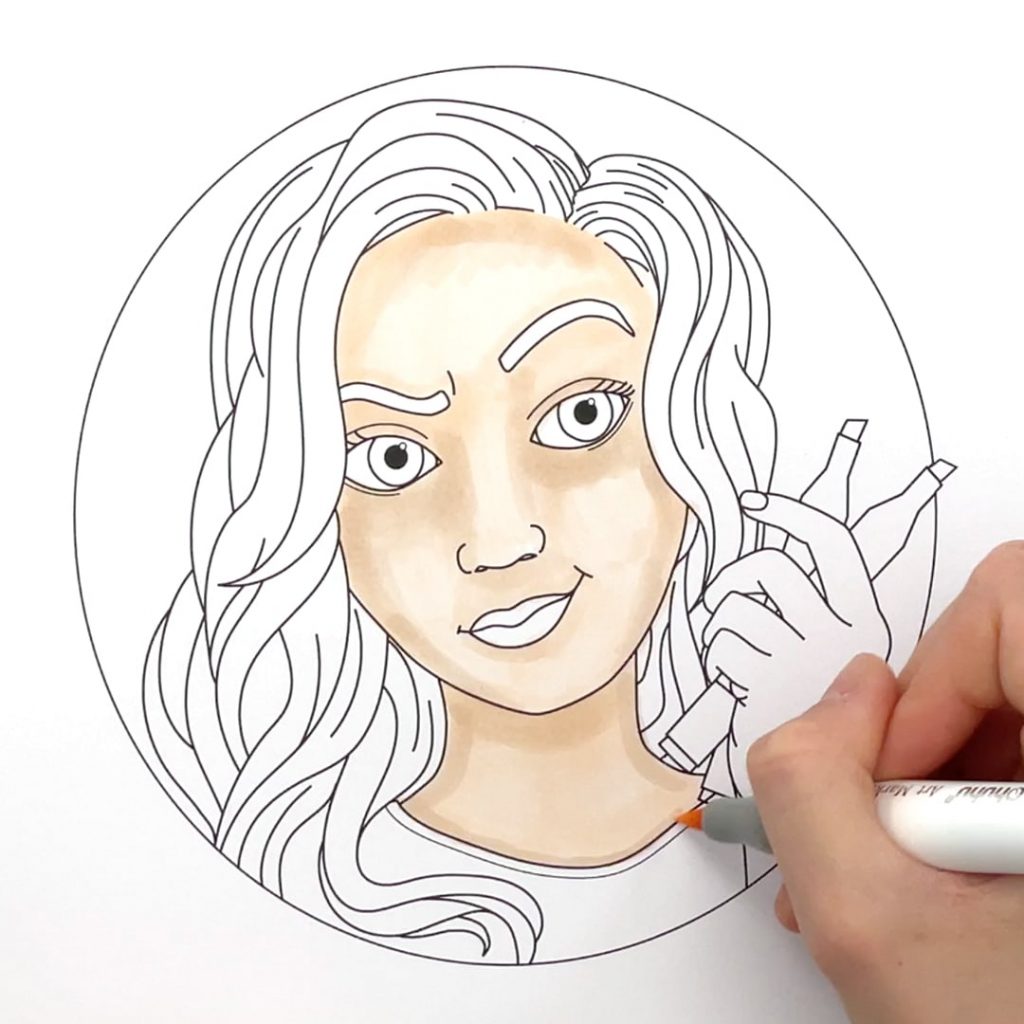
But we don’t have much depth yet, because we’re still only using one color. So it’s time to bring in our midtones.
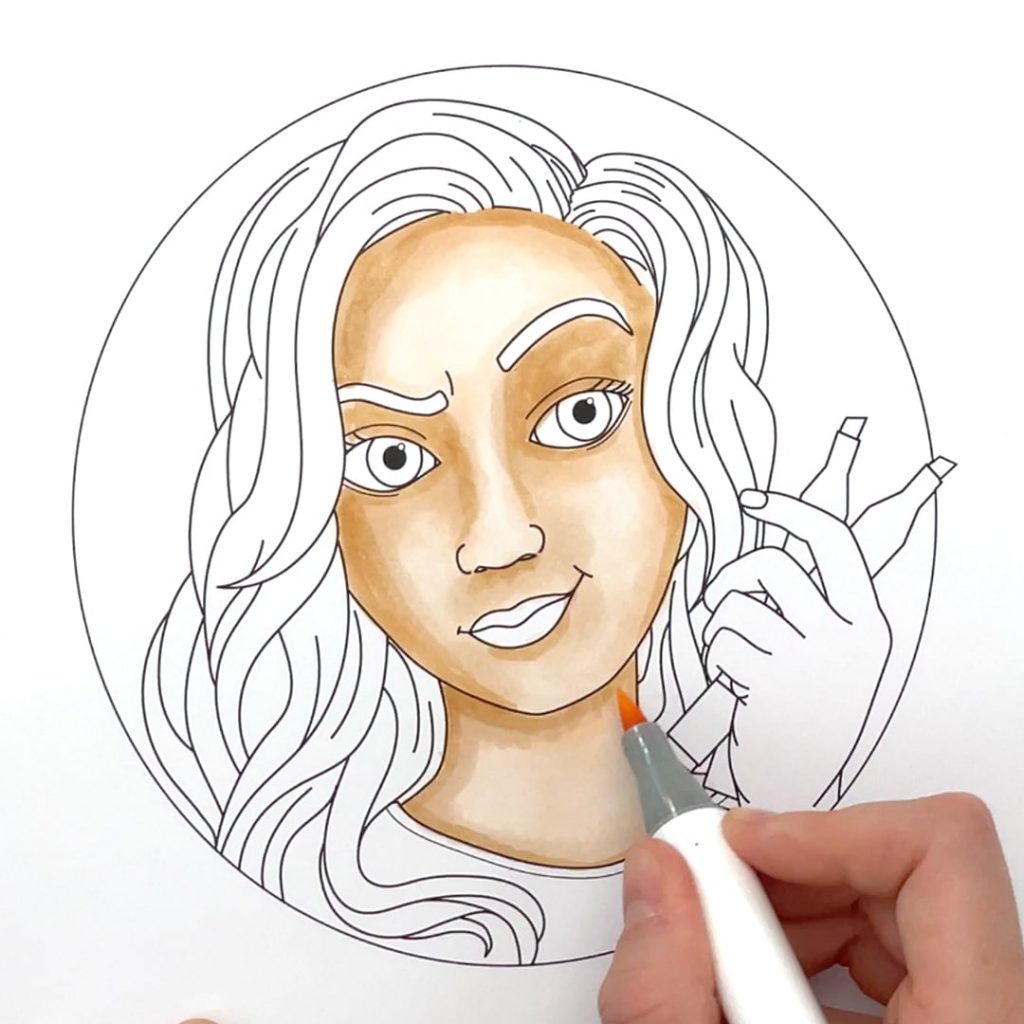
3. Use your midtones for shading
If you are happy with where your shadows are, use your midtone colors and go over these areas again. Remember to work carefully and be patient.
Once you’ve added your midtones, take out your lighter marker again, and use it to blend the midtones into your base color. You can do this by gently going over it too add more moisture and reactivate the inks so they start to blend.
TIP: Don’t be tempted to scrub to try and blend your colors! When I first used alcohol markers, I used to scrub my marker back and forth, trying to make the blend “happen” – until a friend commented on my video on horror at how I was treating my poor markers. I wasn’t until much later that I learned that the only thing your markers need to blend is moisture and time. So be gentle, and patient. Give the ink time to do it’s work!
4. Use your darkest tone for the deepest shadows
Now it’s time to get our darkest color and add some more depth to those shadows. This time, focus on areas like the neck, the frame around the face, and under the hair. Unless you are wanting to create some dramatic light effects, you probably don’t need to add too much of your darkest color around the eyes, nose or mouth. In my case, I did add a little bit around these areas later, because I ended up making the whole face a bit darker than I first planned.

Go back again with your midtones to blend your darkest colors into the rest, and again with your lighter markers if you feel it is necessary.
From here, you can stop, or you can keep working between colors to adjust details, work on specific areas a little more, or darken certain shadows a little more.
In my picture, I decided to keep working on the overall page to darken the midtones quite a bit – you won’t always need to go back and forth as often as I have in this example.

5. Finishing touches
Let’s grab some other colors to finish up the details on the face, including the lips, eyes and eyebrows, and the face is done.
I’m going to use the same method to color her hand. Starting from the lightest color first, then the midtones, then to the darkest color, blending each of the colors in between.
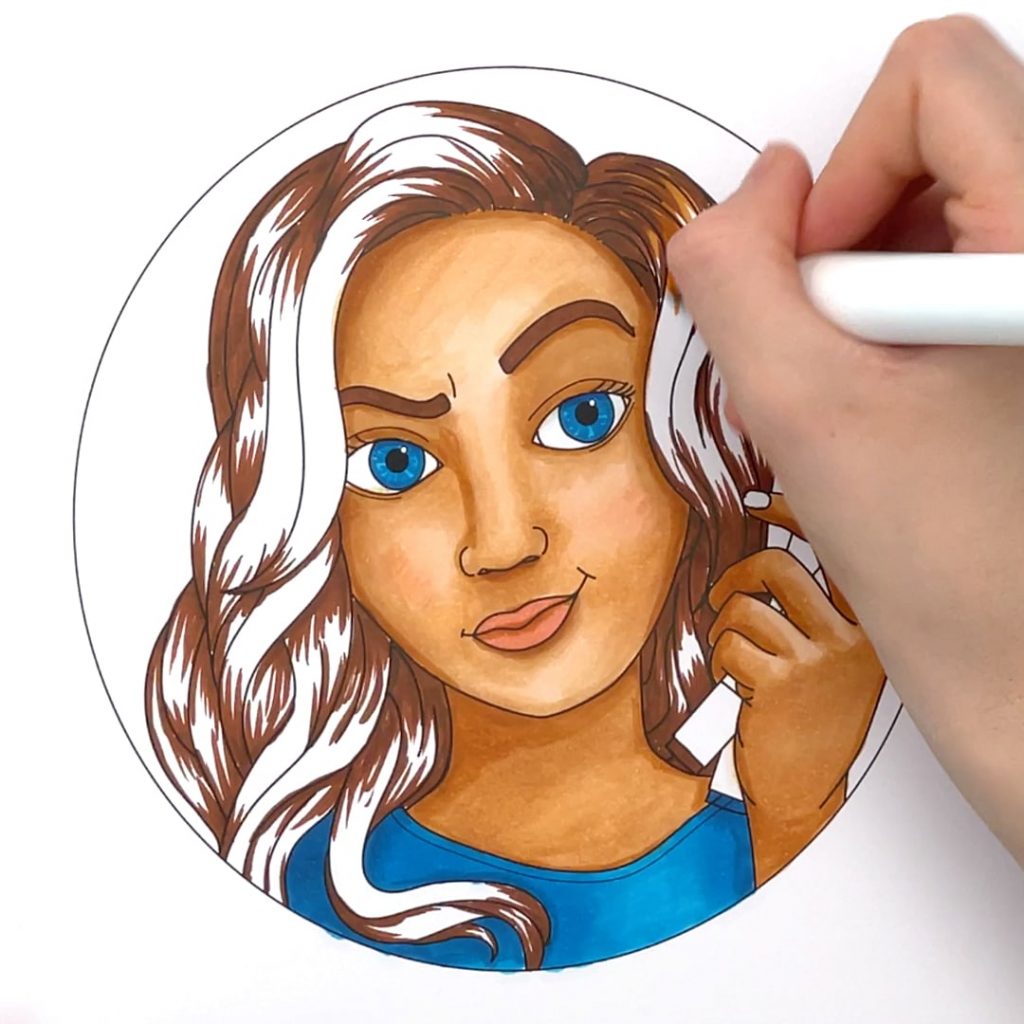
I’m using a feathering blending method for the hair with the markers I’ve chosen from this same set and I’m actually working from the darkest marker first, the midtones, and then the lightest.
And to finish off, we’ll add some final touches with a white pencil and a white gel pen… something I always love to do with my coloring pages. And she’s done!
Other blending methods
In this tutorial, I’ve used a light to dark method of blending – but this isn’t the only way you can blend with alcohol markers. You can also blend dark to light, with a flicking or feather technique, or even mixing the colors by touching the tips of your markers together and letting the color transfer between them. Check out this article from Ohuhu with more details on each of these methods.
Coloring skin tones: advanced lighting techniques
Before we finish up this tutorial, I do want to take a moment to discuss some more advanced lighting ideas.
If we look back at our reference photos, you’ll notice that some of them have some really interesting lighting. And you can replicate this lighting by copying where the lighting is on these faces.
Let me show you an example with this face, and I’m going to choose a different coloring page with a face that’s in a similar pose to our reference photo, who is looking straight ahead.

So instead of doing our shadows around the whole face, the shadows are now predominantly on the right side. The shadows are heavier, and the transition from light to dark is very sharp and quick. I’ve tried copying that as I colored the next page. You can watch me color it in the above video.
As you can see, a different shadow changes the mood of the whole page dramatically. So once you’ve had some practice with basic skin tones and color faces, I encourage you to get creative and try something unique with some interesting lighting. Using a reference photo is a great way to make this easier and less intimidating.
Are you ready to try coloring skin with alcohol markers?
Coloring skin can be intimidating if you are new to coloring – but once you’ve tried it a few times, it can be fun, rewarding, and it’s not as hard as it looks! If you found this tutorial helpful, please let me know by leaving a comment below and tell me what your biggest takeaway has been.
I’d like to finish up with a final thank you to Ohuhu for inviting me to share this guide with you. I’ve only recently discovered Ohuhu’s markers and have quickly become a big fan!
Note:This article is from Sarah Renae Clark.


